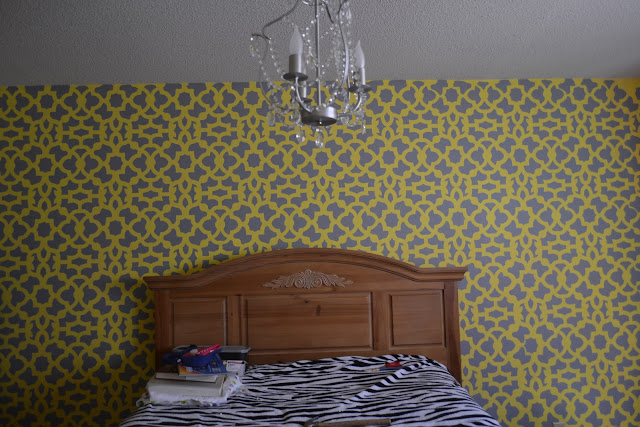
Recently I've been totally obsessed with the color combo of yellow and gray! I just can't get enough of it. Since my room was already painted yellow I decided to do a gray stencil over it on just one wall. All the walls would be too much! Unfortunately we painted my room a really long time ago, back when I was in about 7th grade and of course I didn't know what color it was, or where the paint came from. So I painted just one wall a fresh color of yellow (it didn't match perfect, but it's not totally noticeable now with the gray over it)
The new yellow is a bit brighter than the old yellow. But the gray over it looks so cool.
My advice to you, if you're going to stencil a wall with a stencil from Cutting Edge Stencils, is watch the videos before you start. Don't just read the directions! They make a lot more sense if you watch someone actually doing it before you try. I found this out the hard way. I messed up part of the wall because I didn't understand how the stencil was supposed to be overlapped. But other than that small mistake doing the stenciling was very easy. And it looks so cool.
I started in the middle of the wall so I could get a whole row of the stencil to build from. Well that was the idea. However it didn't work for me since I didn't know how the stencil was interlocking, but I figure it out. :) and only had to repaint a small spot of the wall yellow again.
The first stencil. I just taped it up to the wall and painted over it. The directions from cutting edge give you a specific way to put the paint on the wall so you don't overload the roller and get paint up under the stencil.
Then I got the hang of it and got a lot of the wall done. I had to clean off the paint from the stencil a few times so that the edges didn't get real messy.
This is a picture after I finished the whole wall as I was laying on the floor. I was a bit worn out after doing the whole wall.
Then came the hard part of moving the furniture back in place. Thankfully my dad helped me this time. I moved all the furniture before painting and it was HARD!
Once I got my bed moved back in place. The zebra blanket was not going with the wall too well so I found a gray blanket that looked better.
I picked up a fleece blanket at target and I'm really please with the gray.
I think that wall looks really great especially with my fancy light fixture from Ikea.
Here's a close up of the pattern on the wall.


No comments:
Post a Comment